Write A Wasm Contract
Overview
As Substrate supports WASM smart contracts, it means that any language that can compile to Wasm could be used to write contracts.
This tutorial will help you write, test and build your first smart contract and deploy it onto Selendra using ink! (opens in a new tab) language, an Embedded Domain Specific Language (EDSL) that you can use to write WebAssembly based smart contracts in the Rust programming language.
Environment Setup
This tutorial is designed for OSX and the most popular Linux distributions.
Install Rust & Cargo
On Linux and macOS systems, this is done as follows:
curl https://sh.rustup.rs -sSf | shOn Windows, download and run rustup-init.exe (opens in a new tab). It will start the installation in a console.
Install the Ink! CLI
rustup component add rust-src
cargo install --force --locked cargo-contract

export TOOLCHAIN_VERSION=nightly-2023-12-28
rustup install $TOOLCHAIN_VERSION
rustup component add rust-src --toolchain $TOOLCHAIN_VERSION
rustup run $TOOLCHAIN_VERSION cargo install cargo-dylint dylint-link
Create an ink! project
Let's start with a very simple contract called Flipper. The Flipper contract is nothing more than a bool which gets flipped from true to false through the flip() function.
Now we will generate files for the smart contract project and enter the directory.
cargo contract new flipper && cd flipperThe files structure looks like this
flipper
|
.
├── Cargo.toml
└── lib.rs
Add OpenBrush (Optional)
Additionally, For easy and fast development use smart contract library OpenBrush (opens in a new tab).
You can copy the code for the lib.rs and Cargo.toml file under the section “How to use” into your project.

Build
cargo contract buildTest
Now we will verify the functionality of the contract. We can quickly test that his code is functioning as expected using the off-chain test environment that ink! provides
cargo testDeploy
Now that we have generated the Wasm binary from our source code. We want to deploy this contract onto Selendra.
In Substrate, the contract deployment process is split into two steps:
- Putting your contract code on the blockchain
- Creating an instance of your contract
With this pattern, contract code like the ERC20 standard can be put on the blockchain one single time, but instantiated any number of times. No need to continually upload the same source code over and waste space on the blockchain.
1. Upload Contract code
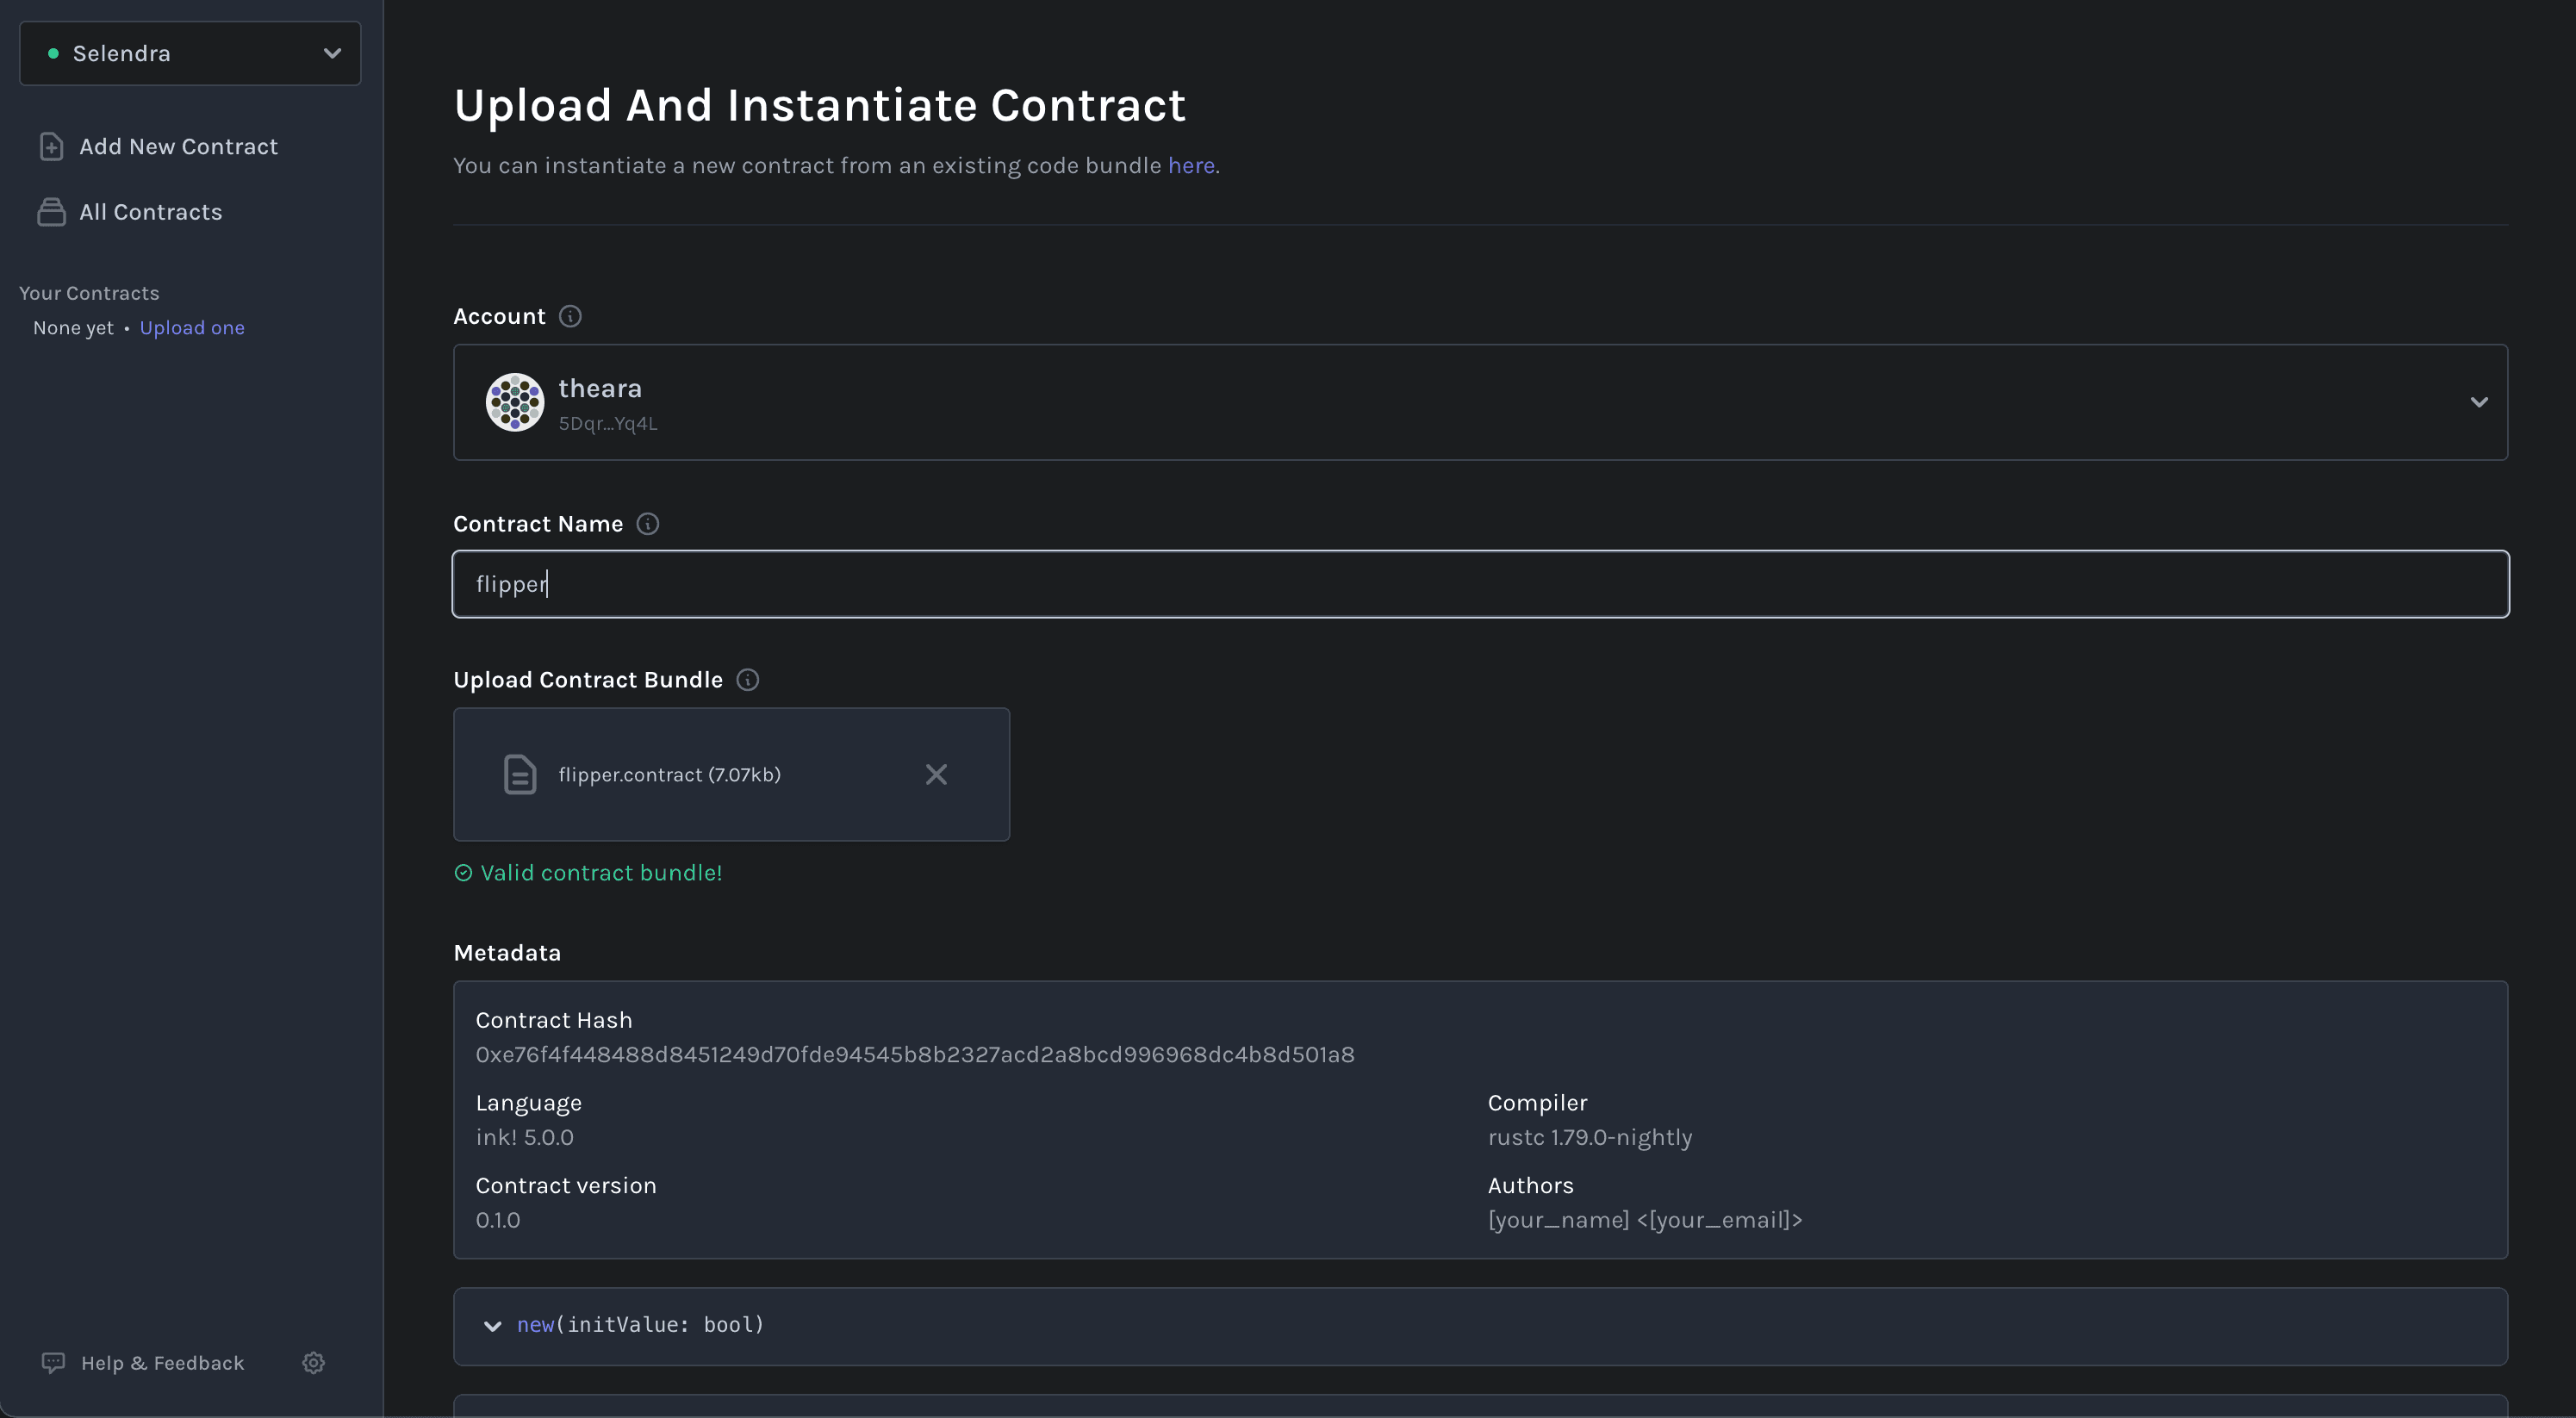
Go to Selendra Contracts UI. Login to your account with PolkadotJS extenstion if you're not already logged in.
- Click the Add New Contract button in the sidebar.
- Click the Upload New Contract Code button in the Add New Contract page.
- Choose an Instantiation account (e.g. theara).
- Give the contract a descriptive Name (e.g. Flipper Contract).
- Drag the
flipper.contractfile that contains the bundled Wasm blob and metadata into the drag & drop area. You will see the UI parse the metadata and enabling the button that takes you to the next step. - Click the Next button
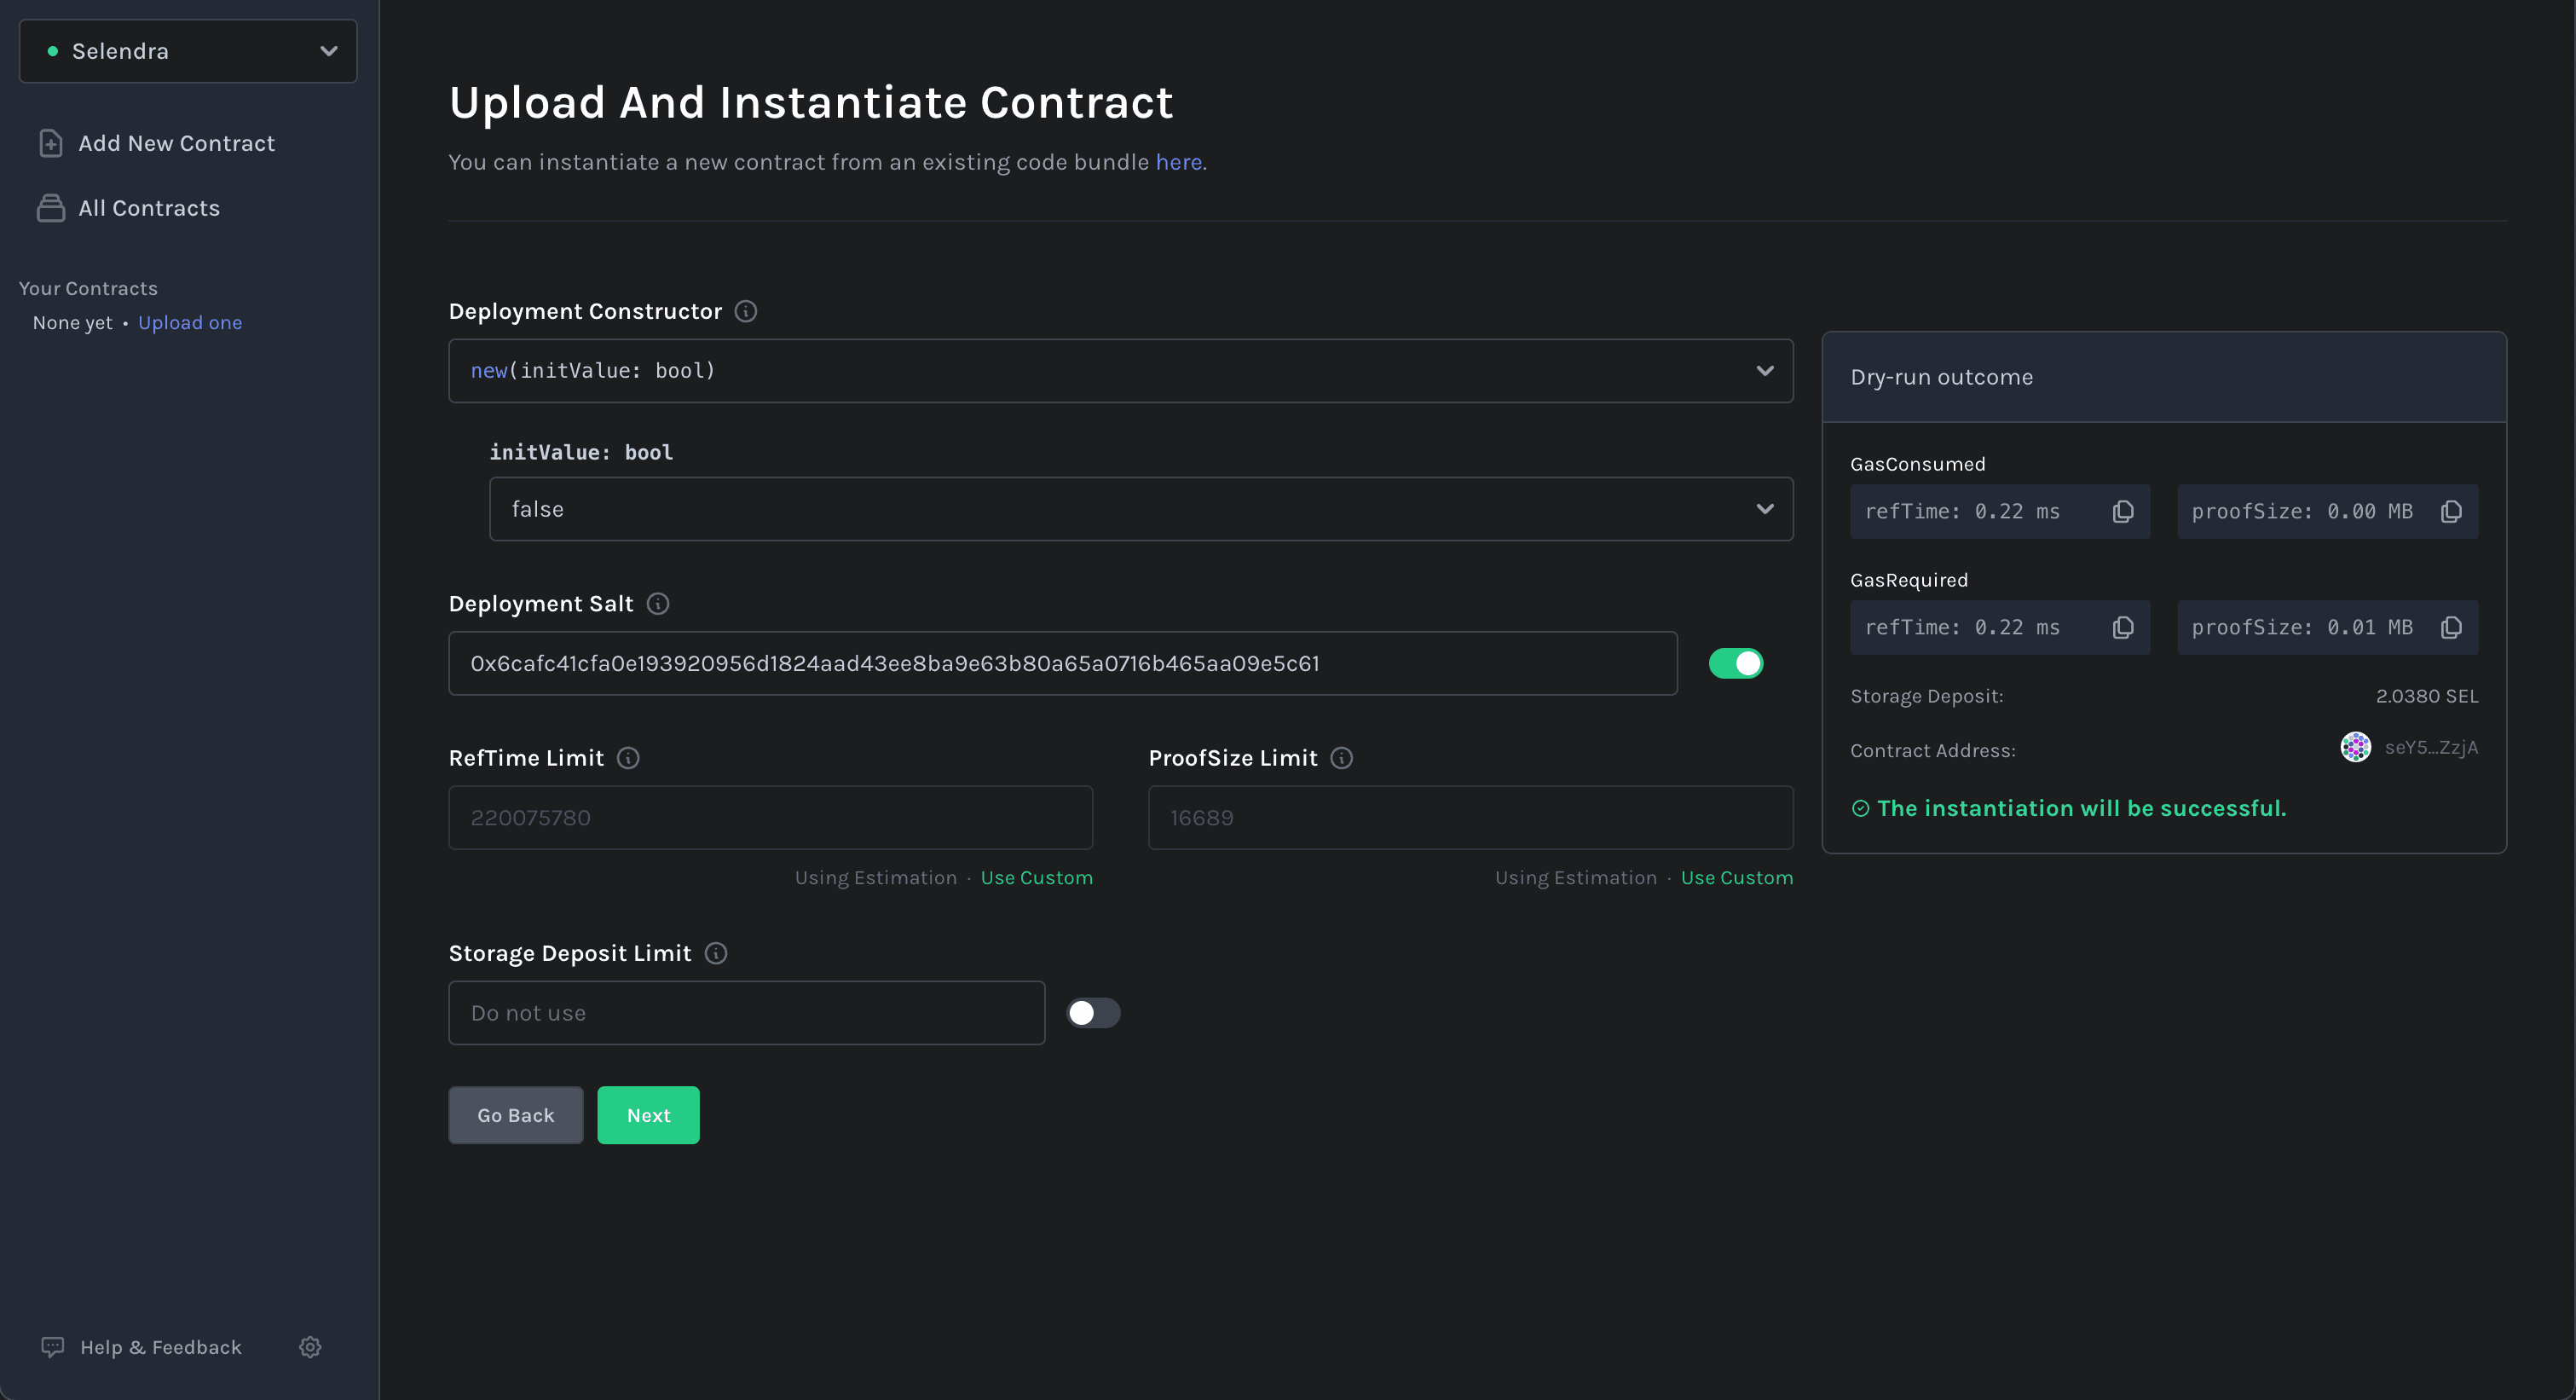
2. Instantiate a Contract on the Blockchain
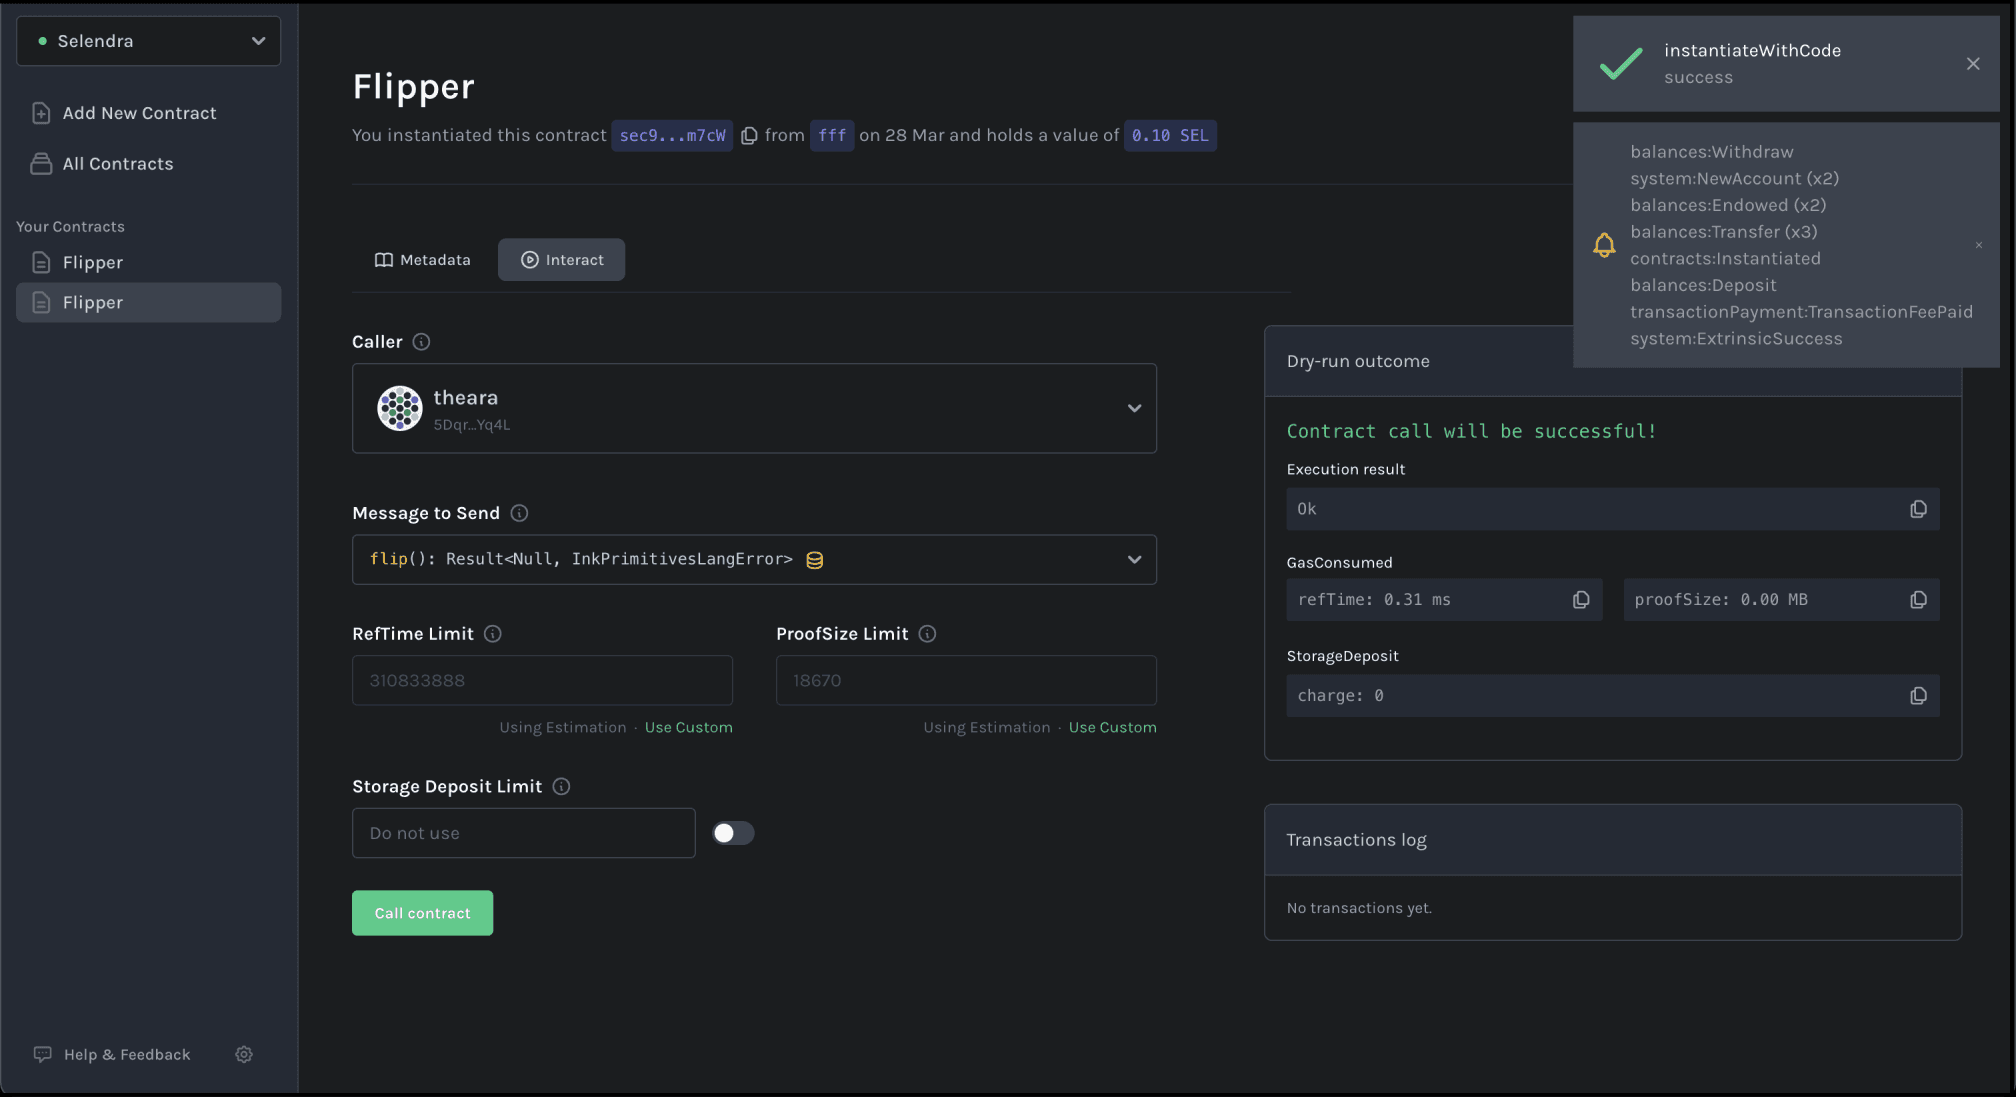
Smart contracts exist as an extension of the account system on the blockchain. Thus creating an instance of this contract will create a new AccountId which will store any balance managed by the smart contract and allow us to interact with the contract.
Now a screen displays the information that represents our smart contract. We are going to instantiate a copy of the smart contract:
- Accept the default options for the contract Deployment Constructor.
- Accept the default options Max Gas Allowed of
200000. - Click on
Next
The transaction is now queued, review your data and click Upload and Instantiate or go back and modify your inputs.
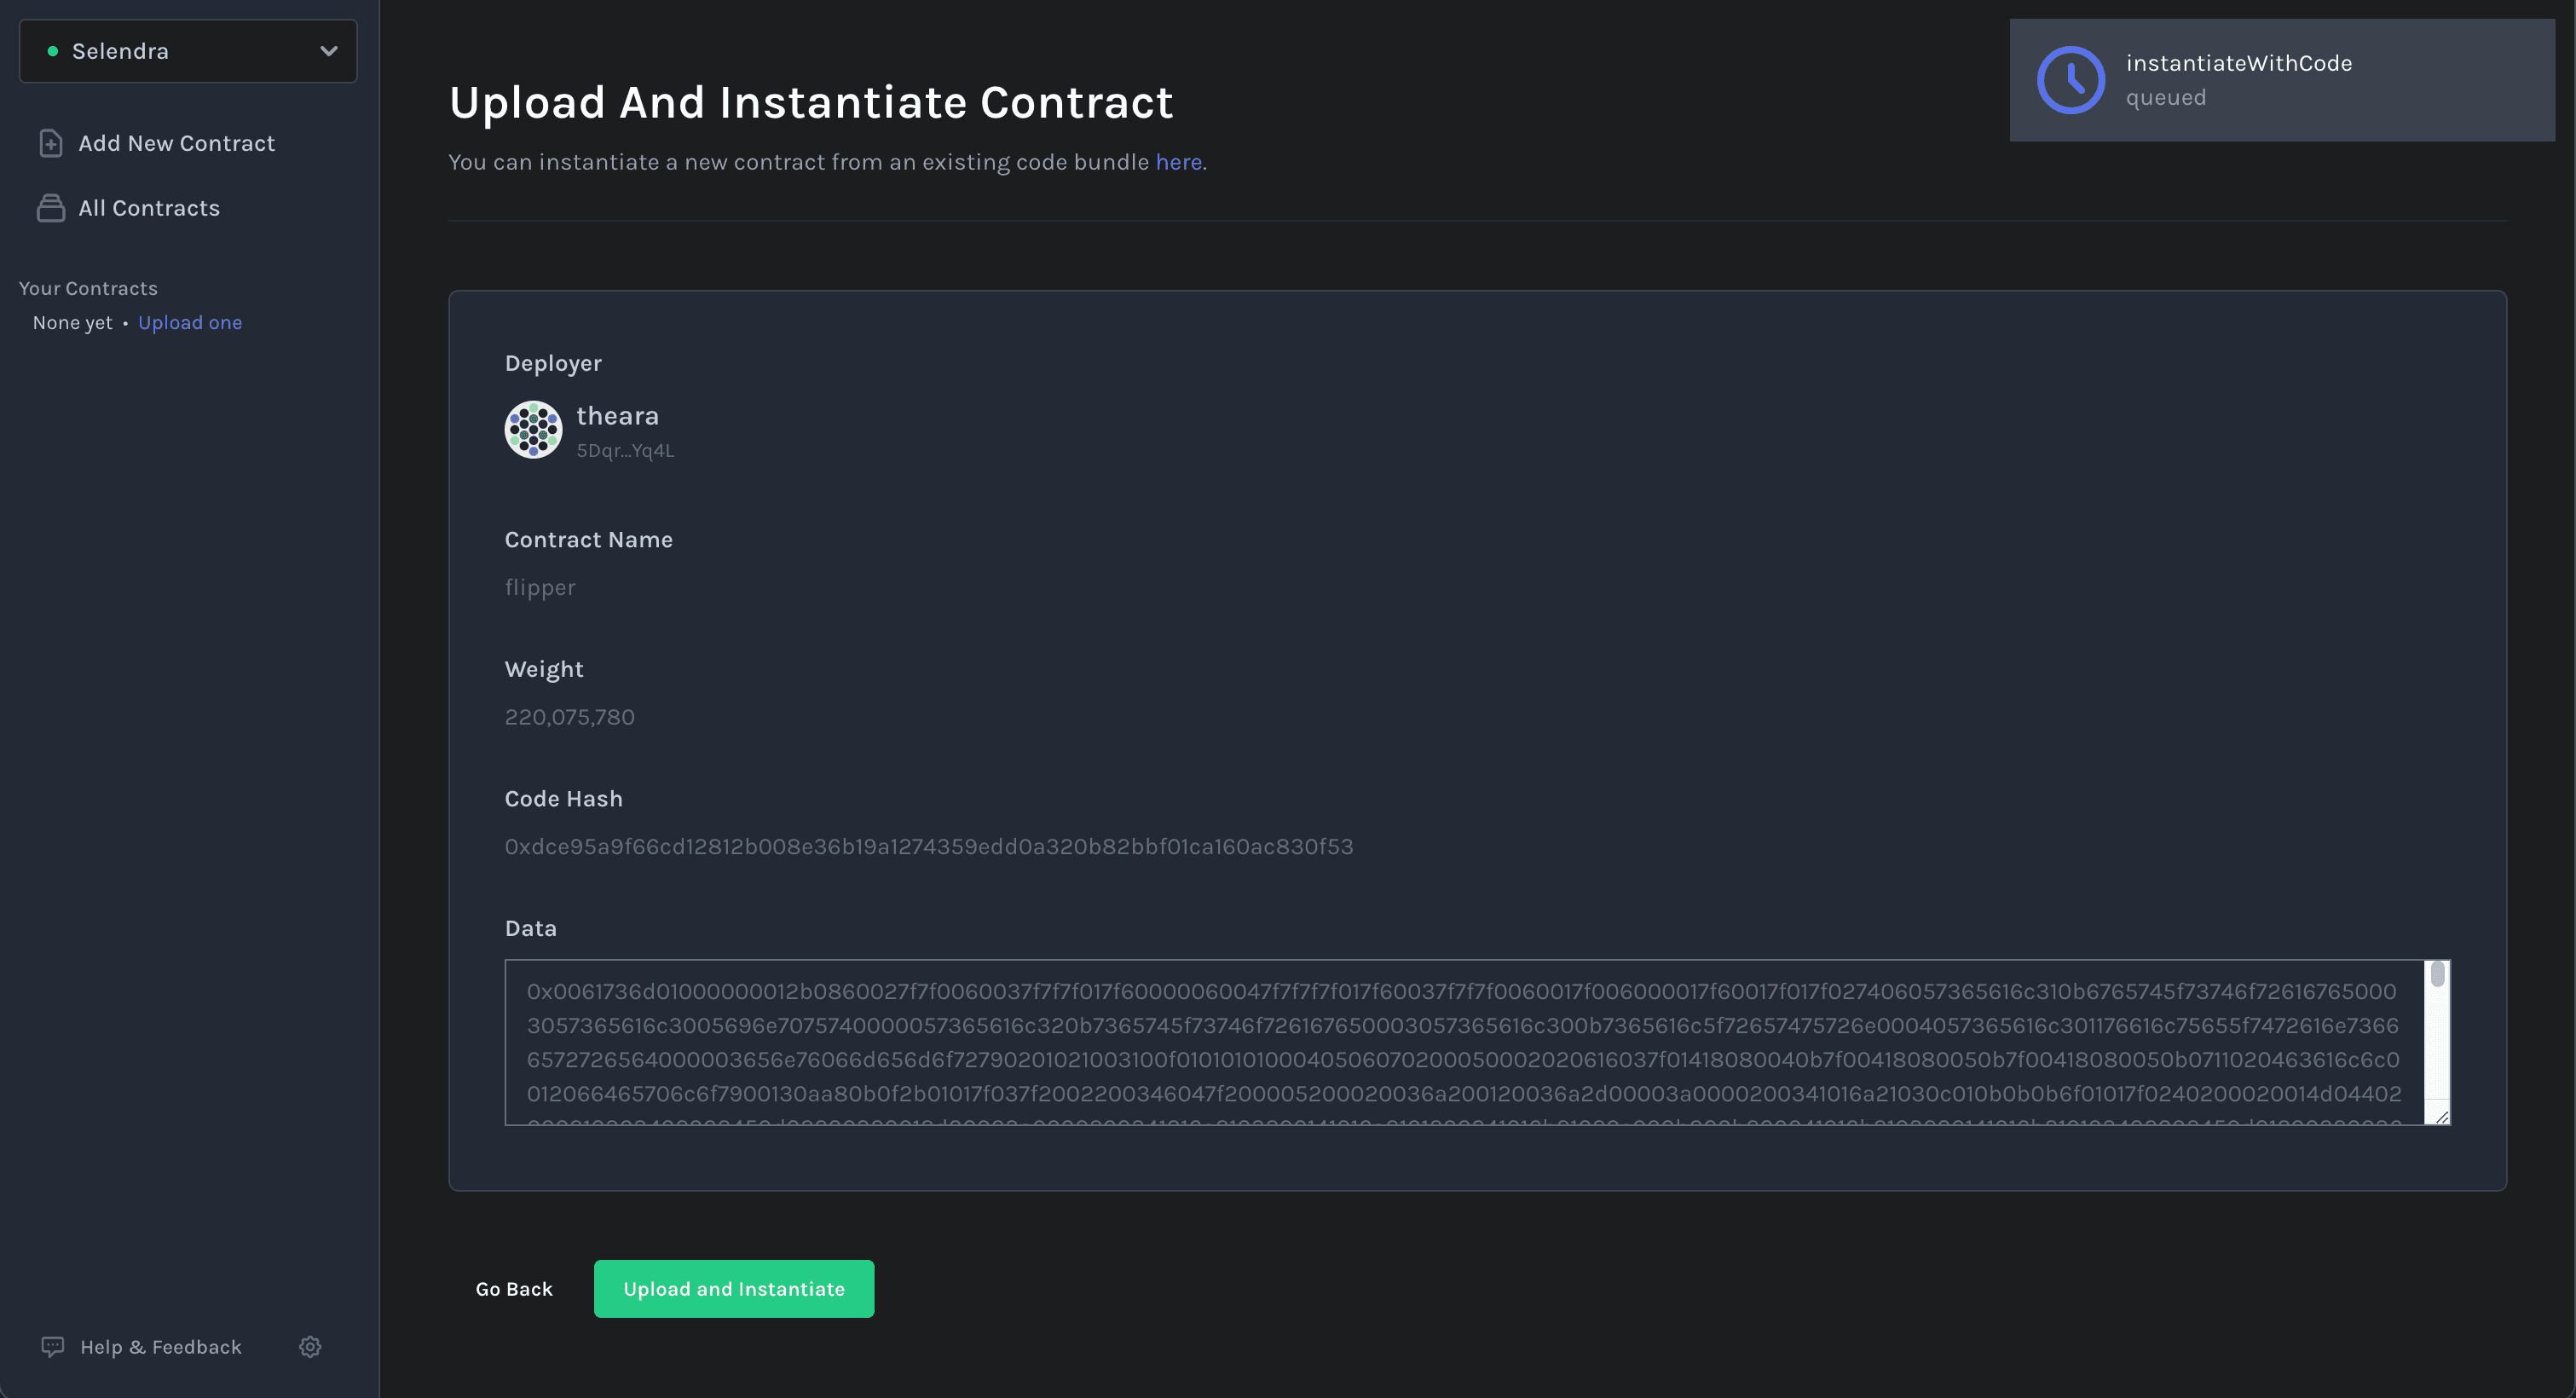
When you click Upload and Instantiate you should see the extrinsic instantiateWithCode is processing, and a flurry of events appear including the creation of a new account system.NewAccount and the instantiation of the contract contracts.Instantiated. You will be redirected to a new page, where you can interact with the newly created contract instance.